Creating Library Banners Signage with Canva – with templates
Signage can have a massive impact in a school library. Part accessibility, part marketing, your signage helps your students find and discover sections.
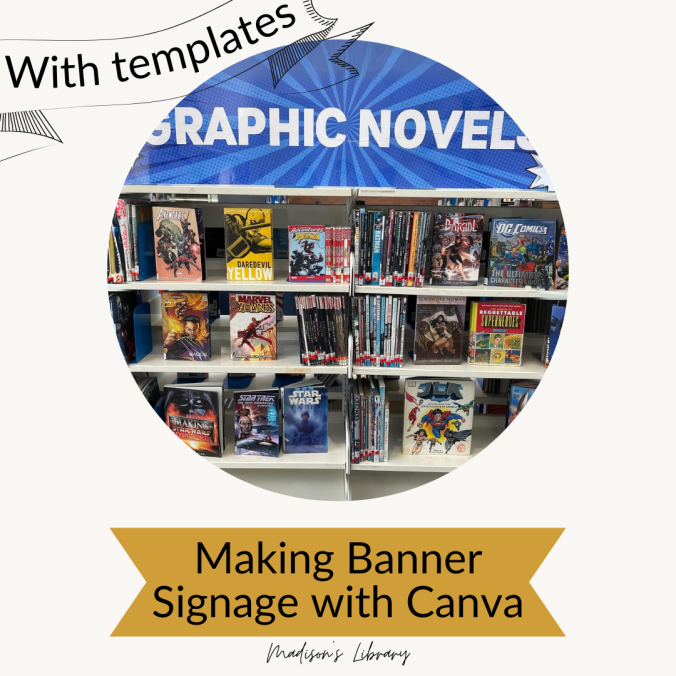
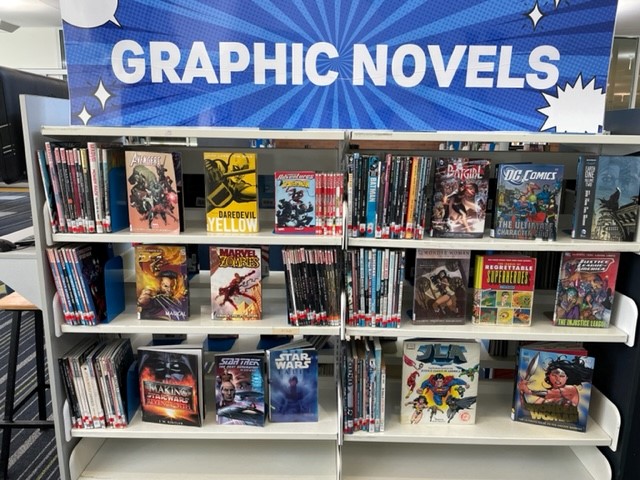
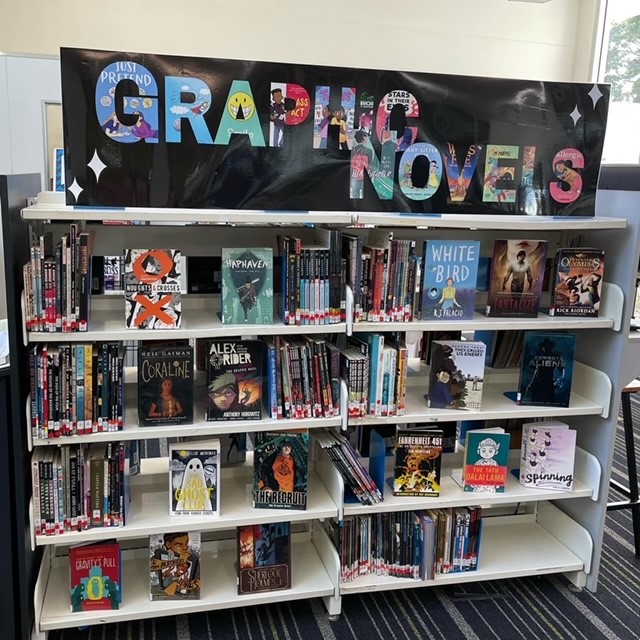
Depending on your shelving and wall space, large banner signage can make a big statement, and disguise old walls or hide unsightly shelving tops. When in our old library space, our graphic novel section needed a lot of love and new banner signs above the collection really gave it a lift. You can read all about how I updated the graphic novel collection here.
Creating large banner signs is surprisingly easy and no, you don’t need a wide printer or poster maker to create these signs. Just Canva and a basic printer and a few items you’ll find in your library space.
If you’ve never used Canva before, try my getting started tips here.
Start by signing into Canva. Don’t forget that school staff get free Canva for Education accounts.
Creating your project
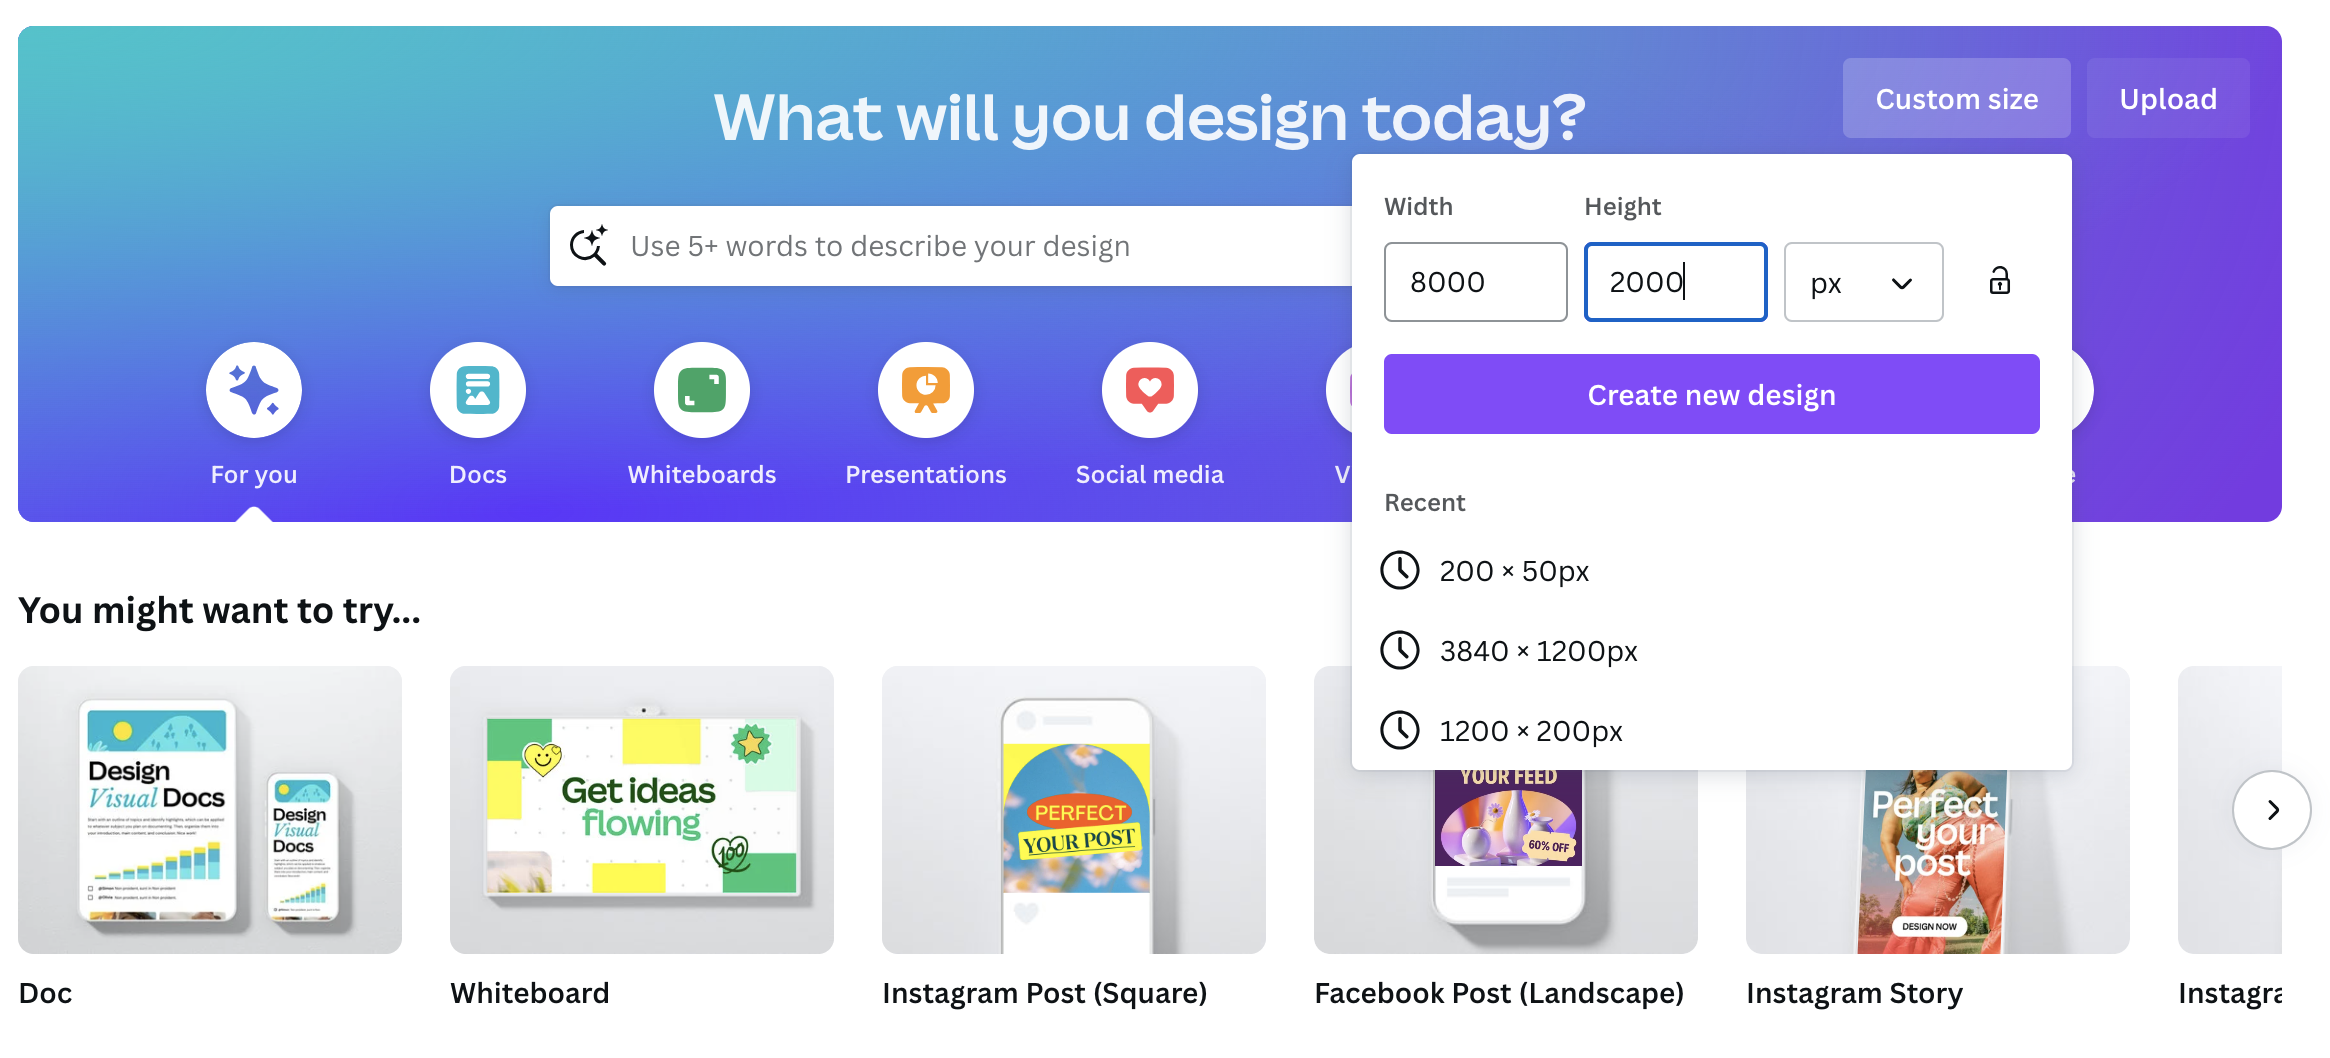
I start by creating my design using custom sizing, using the biggest size possible. For these banners I used a 8000 x 2000 pixels design, but you can customise this to the shape you need for your shelving or wall. Here is a template set-up and ready to go.
Now you can start designing. Canva will make some design suggestions. You can also jump straight in by changing the background colour, adding text, images or graphics.
Graphic Novel Banners
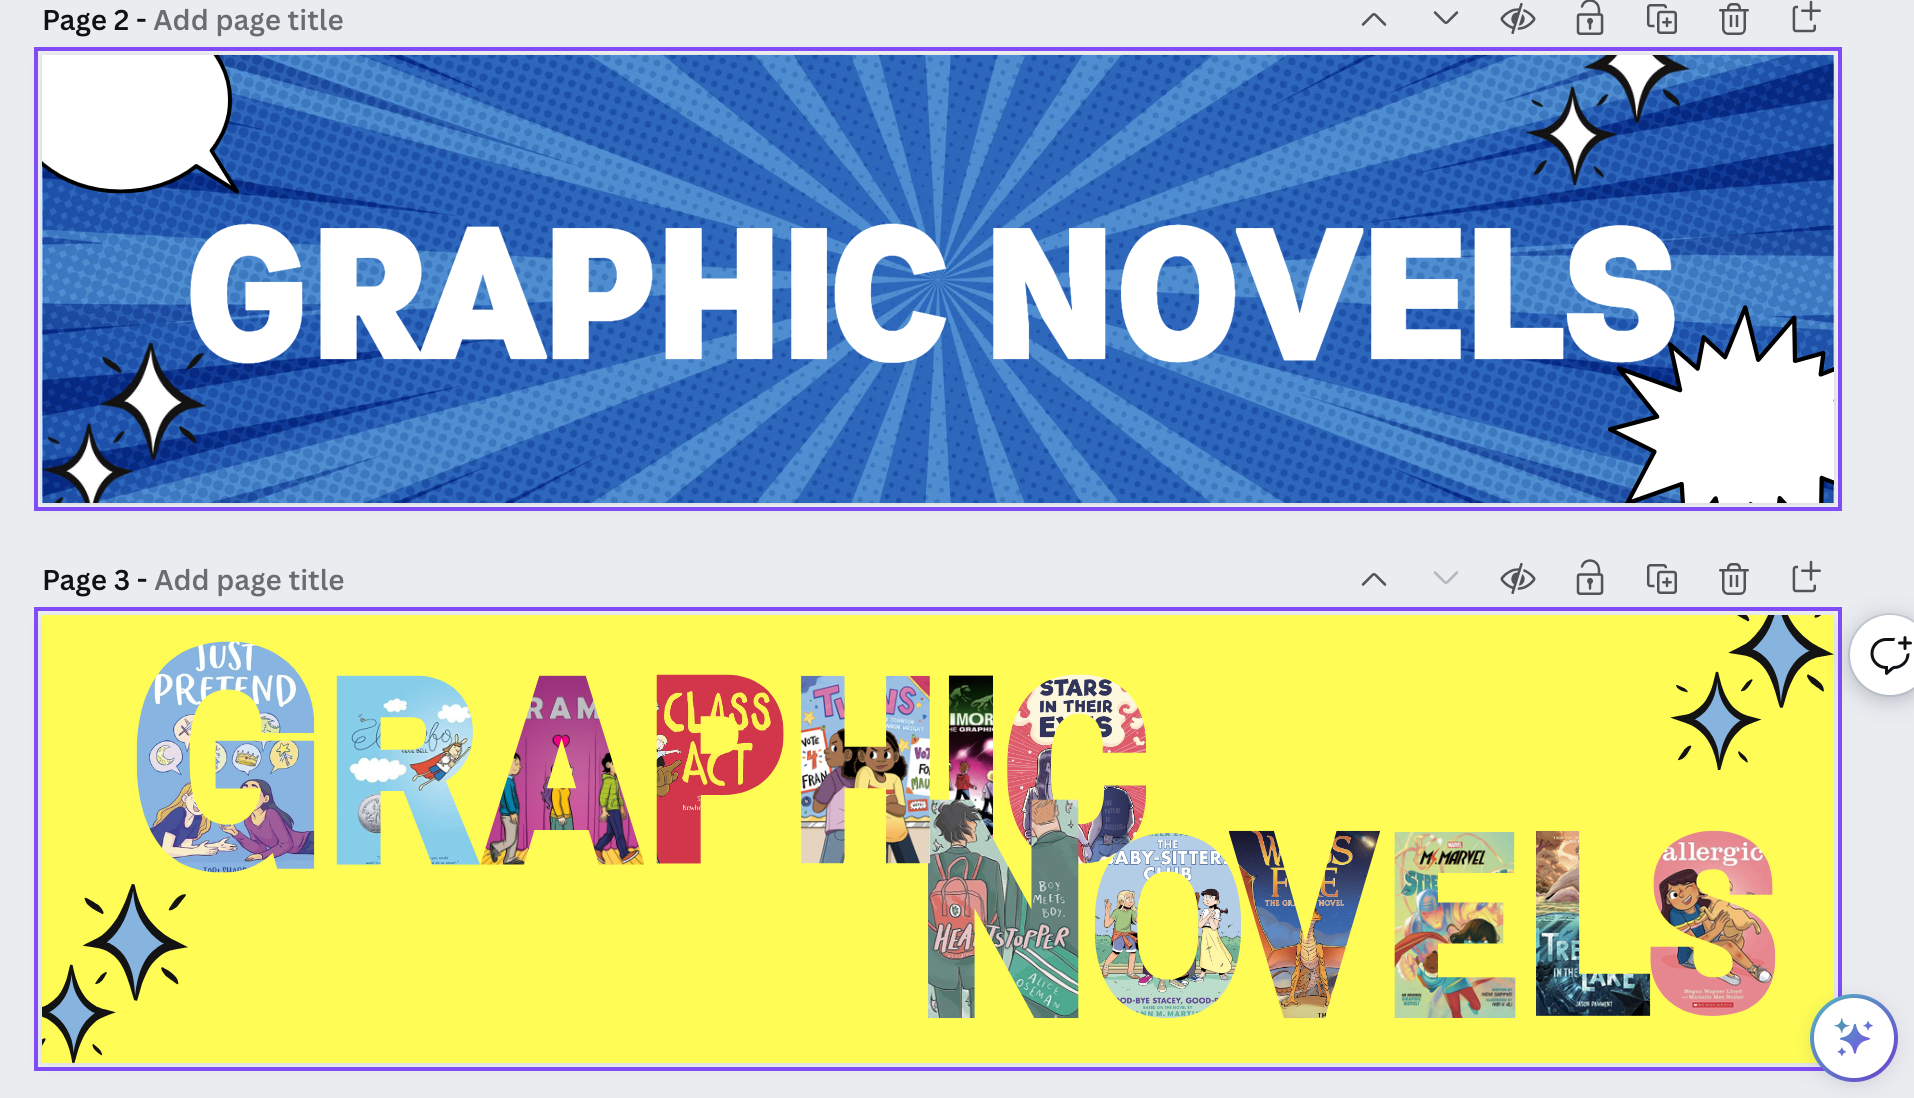
Want the two banners I created for the Graphic Novel section? You can download them here and follow the instructions below for printing or edit them to suit the style you’d like. You might like to change the background colours to reduce printing ink.
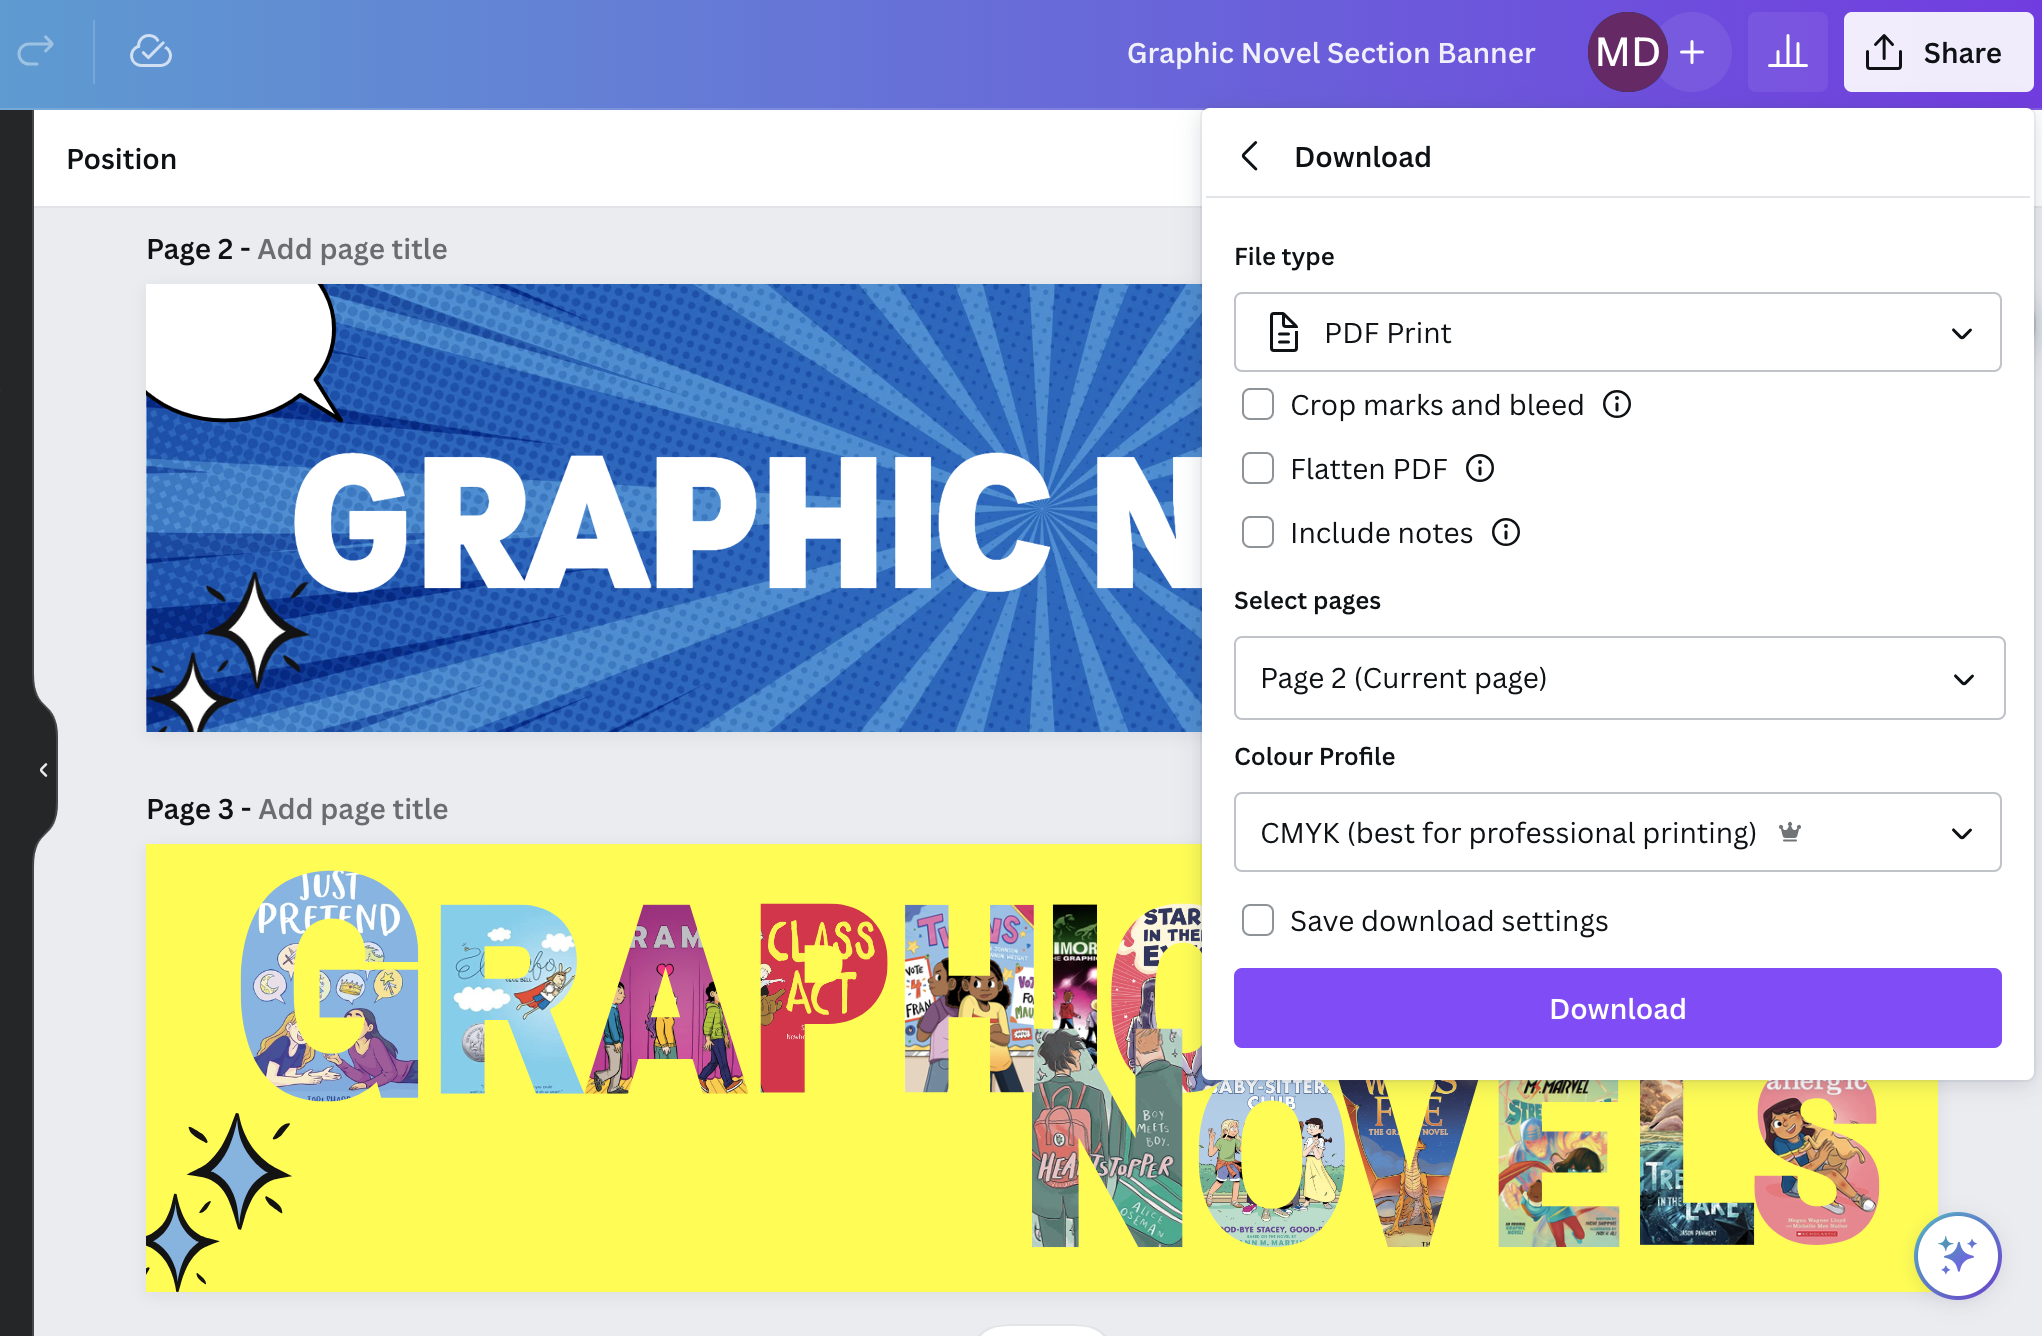
Download
To download and print your project, click Share in the top right corner. From the menu, select Download. Now you need to select your download settings. I recommend selecting PDF Print in the top File type drop down. I also select CMYK for the Colour Profile. This will create a large file that is best suited to printing.
Printing
If you have access to a wide-format printer or poster maker, you can use the file to print directly with that. If you don’t you can still use a standard printer to poster-print your design. You will need the free software Adobe Acrobat Reader. You can download this for free for both Mac and windows computers here. You can also use the Rasterbator online platform, but I prefer the flexibility and ease of Adobe. I also find a I get a much crisper finish.
*Please note, that MacOS Sonoma no longer supports this feature in Adobe Acrobat Reader. It works fine in the licensed Adobe Acrobat.
Open your pdf with Adobe Acrobat Reader. If you computer opens your PDF file automatically with another software, right click on your file and select Open with Adobe Acrobat Reader.
To print, select print and then select Poster in the print options window. Select your tile scale to resize the image. The preview will show you how many pages this will spread the image across. I usually set my paper to A3 to reduce the amount of cutting and taping required, but you can do it with A4.
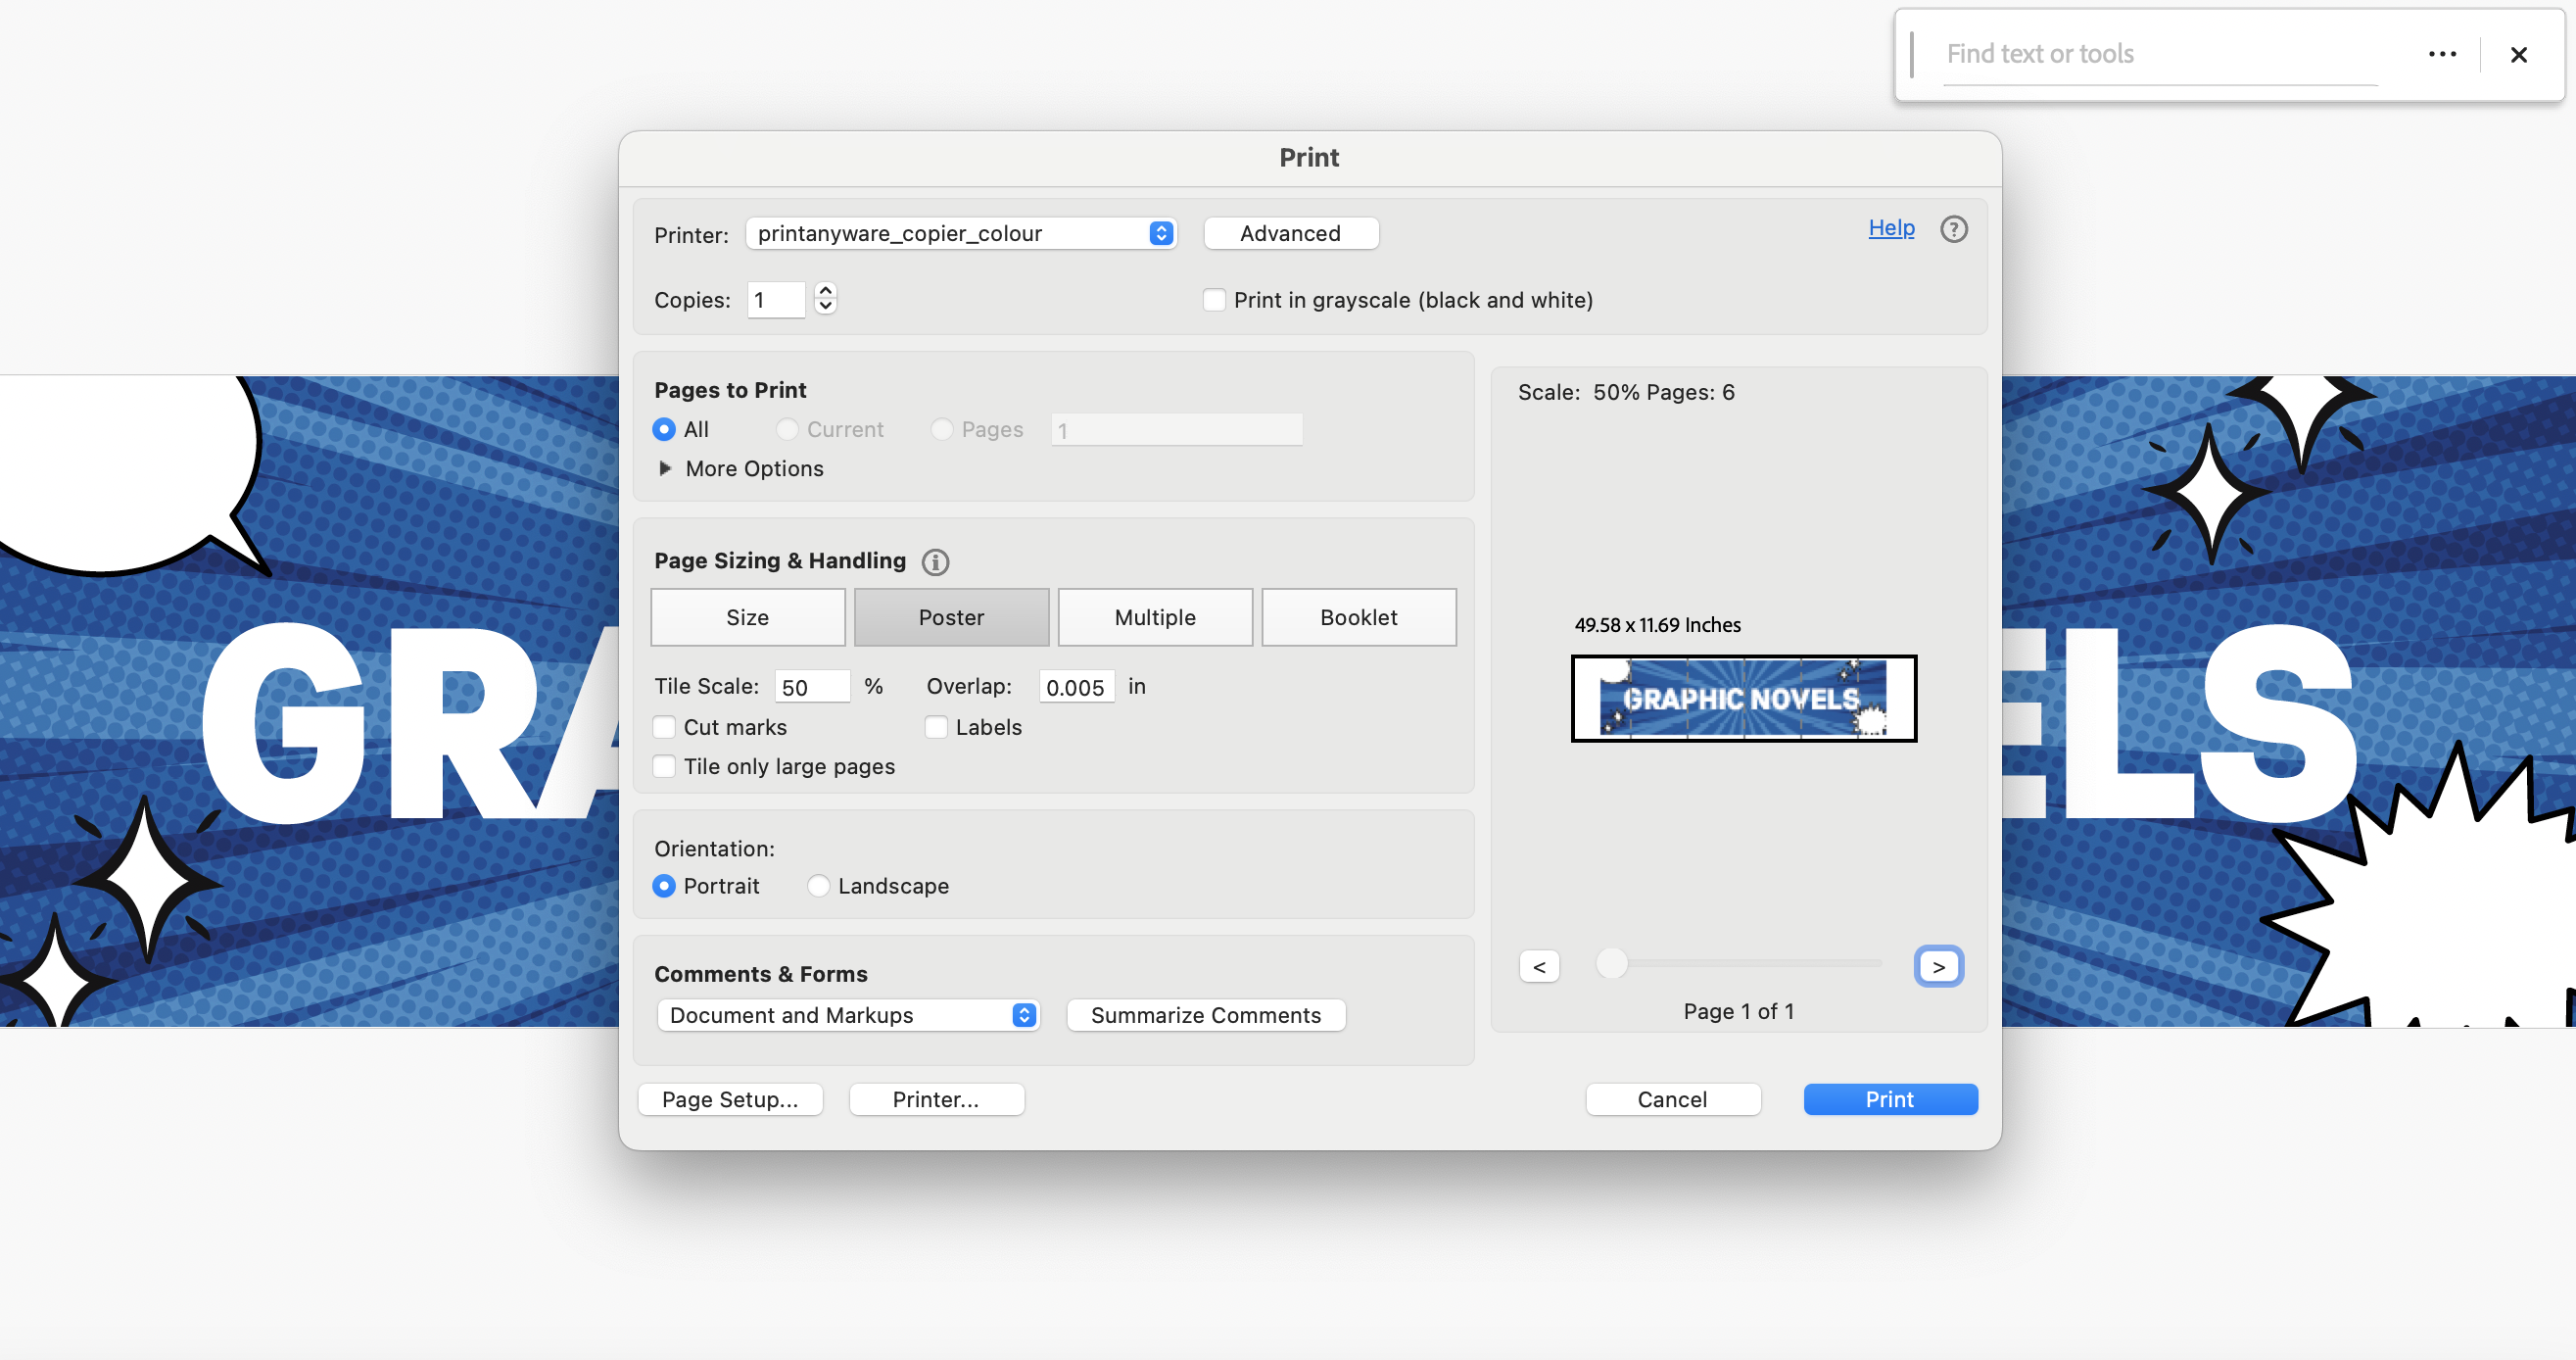
I don’t usually change the overlap setting or use cut marks. Hit print.
Cutting, taping and laminating
The banner will print out over a number of pages. Then you need to trim away the white sections. I usually leave the wide edge on one side and leave it on the other, so I can stick the pages together more easily, using glue and tape along the back to keep it secure.
I usually hate laminating, way too much plastic used needlessly, but if you have used paper to print your banner, laminating can give it a lot more strength. Alternatively, print on thicker card.
Displaying
If you are wanting to stand your sign on your shelving, as I did, tape, rulers and spare bookends create the perfect stand. I spread five bookends along the top of the signage and taped the sign to the bookends. Rulers attached to the bookends and poster helped the top of the banner from falling over, extending the height of the bookend. You can also easily add holes along the top of the banner to hang the sign or tape to a wall.
Happy creating.

Leave a Reply