
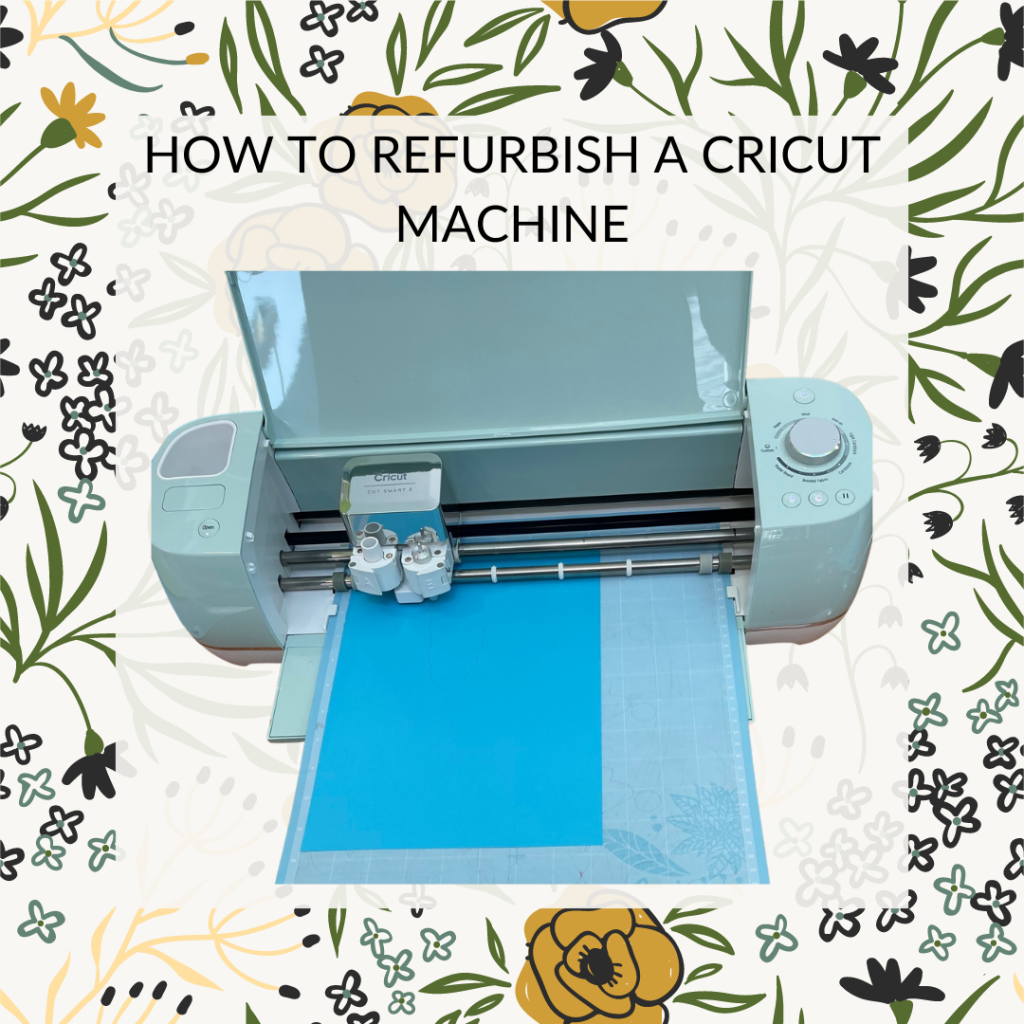
Refurbishing a Cricut Machine
I have been fortunate to have a Cricut machine in each of my past 3 libraries. I love them. I love getting creative, love how these machines can make displays, signage and crafting activities easy. So, I was excited and – let’s be honest – relieved when my new library said they had a Cricut machine.
However, I was a little shocked when the Library team mentioned that they didn’t use it and found it easier to cut things by hand. Seriously? That didn’t make any sense to me. It only took the first time me getting it out to use it to understand where exactly they were coming from and why they were finding it so frustrating. I found it frustrating! It took longer than it should and even making a simple project wasn’t easy. Why? The machine had been given to the team without the proper tools and with no training or instruction. The mats were old and either had left over paper struck to them or had lost their stick altogether. And the team had only ever been told to use it with an iPad rather than on a desktop. It was like trying to use the machine with our hands tied behind our backs. Completely impractical and a waste of time.
Thanks to having used a Cricut before, I knew what it could and should be like. And I knew I could refurbish the machine to make it fun and easy to use. Here’s what I did.
How to update a machine
If you’ve decided to purchase a secondhand machine or have inherited an older machine for your library, here’s a few simple steps and tips to get the machine running again smoothly and so you can enjoy using it.
These tips are not going to help a machine that isn’t functioning properly – I leave that to someone with technological and mechanical knowledge, but these should help you get the basics of the machine working well.
Not sure if a Cricut is right for your Library? Check out my post Cutting machines in the Library which goes into the pros and cons.
The right tools
Tip number one is to check you have the right tools. While there are hundreds of tool options out there, Cricut brand and generic alike, there are a few that I consider absolutely essential. The first is the scraper. When I’ve purchased machines, mine always came with one, but this inherited machine didn’t have one. And let me tell you, that makes things hard. While the scraper is marketed as being great for scraping mats clean and applying details it really is an all-round, handy tool. I use it to lift material off the mats, apply vinyl, remove material from the mats – basically everything. And I have yet to find something that is as good as the official scraper.
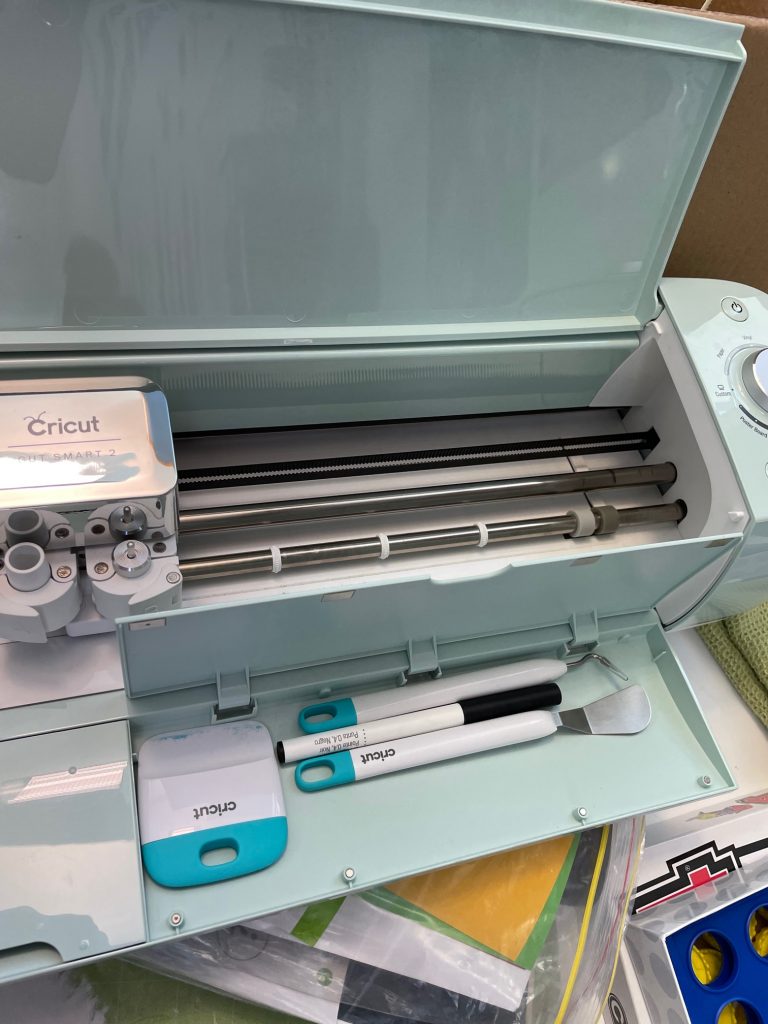
Displayed left to right and top to bottom: scraper, weeding pick, black pen, spatula. All stored in the handy storage space in the bottom flap of the Cricut Explore Air machine.
The second essential tool is the spatula. This handy little tool is vital for cleaning off your mats and removing really tricky and delicate work. I don’t use it as much for removing my cut pieces from the mat, but when it comes to refurbishing your mats, this is a tool you are going to need.
If you are working with vinyl or HTV, you are going to need the weeding tool or tweezers. For this, you don’t need to stick to the official brand. My favourite tool for working with vinyl was a pair of tweezers I “borrowed” from the library’s first aid box (after I disinfected them).
Mats
Okay, let’s talk about the cutting mats. If you find yourself with a Cricut Joy or one of the new third series machines, you can get away with not using a mat, but for most machines, most projects and most materials you’ll need to use one of the sticky mats.
Here’s a few problems to lookout for and how to fix them
Mats have paper or vinyl backing stuck to them.
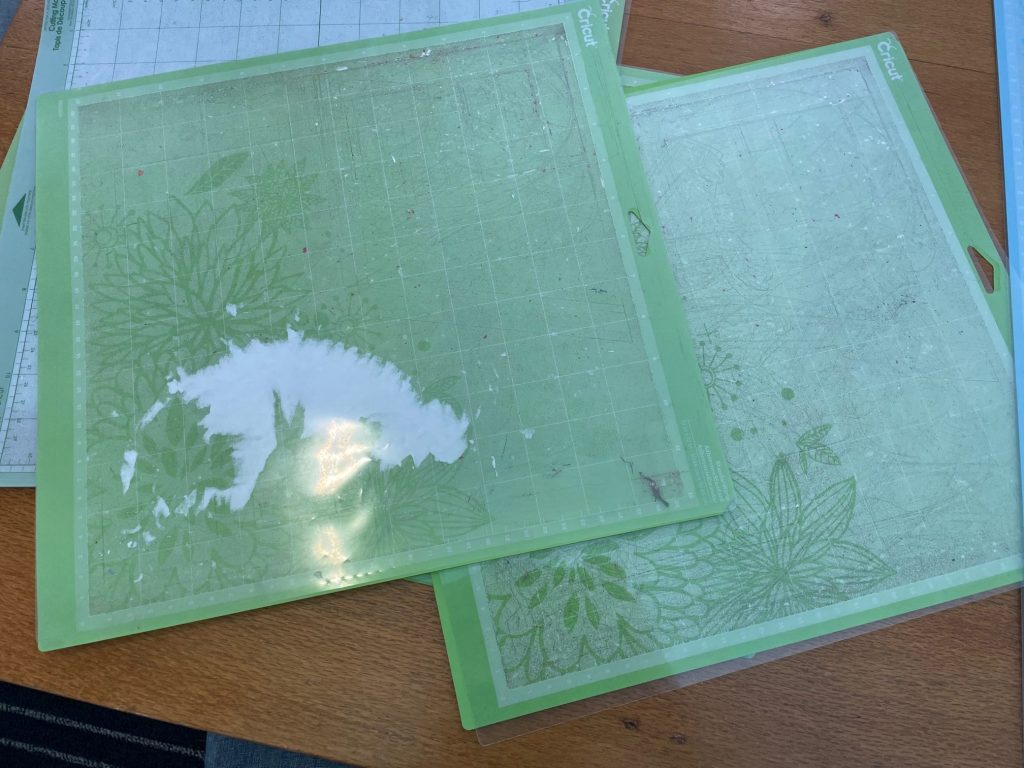
If your mat looks like this, it’s time for a clean up. The best tool for the job is the spatula. It will scrape the paper right off.
Your mats are not sticky
Have your mats lots their stickiness? Is your material moving around when you cut? There are a few steps you can take to bring back the stick.
At first, if your mats are not that old and are still slightly sticky, try wiping them over with soapy water. I know! It sounds like the opposite of what you need to do, but I promise you it works. Using a dishcloth works perfectly. Give them a wipe down and then pat dry and leave them to dry completely.
If that doesn’t work for you, the next step is to remove all the glue and any material scraps. The spatula is ideal for this. Really scrape them down; you’ll see the glue peel off. Once the mat is completely clean, use a two way glue stick. You’ll find these online. I use the Zig brand from CraftOnline, usually in the biggest point tip I can get. Run the glue pen over the mat evenly until the entire surface is lightly covered. Try not to use to heavily or in clumps as this will create really sticky points that will rip your material. A light, even covering will work fine. Do not replace the clear mat covers until the glue has completely dried clear. You might also like to press a towel into the mat before you use it. This picks up a fine covering of lint which just evens out the stickiness and prevents your material from sticking.
Your mats are too sticky
Find you material constantly sticking? Tired of your paper from ripping? Try pressing a towel onto the mat a few times to get some lint on the mat. This is a great tip when you have got new mats. That will reduce the stickiness.
Your mats are cracked
Depending on where your mats are cracked, you can still use them. If the crack is to one side, use tape on the back (book repair webbed tape is perfect) to cover the crack. Just make sure when you use your material that you use the side without a crack. If the blade runs over the crack it will get stuck, but if you like me often use A4 paper or small pieces, I can work around a crack on one side and continue to use the mat.
Extra mats
Have at least two mats of each size. Having multiple mats allows you to remove your material from the mat while the machine continues to cut with the other mat. Having more than 2 mats allows a flow, peeling from one, machine cutting on another and a third with the next piece of material ready to go. It means you can cut more quickly. You can also rotate mats. Use the less sticky mats for cutting vinyl and paper, the sticker mats for cardboard and thicker materials.
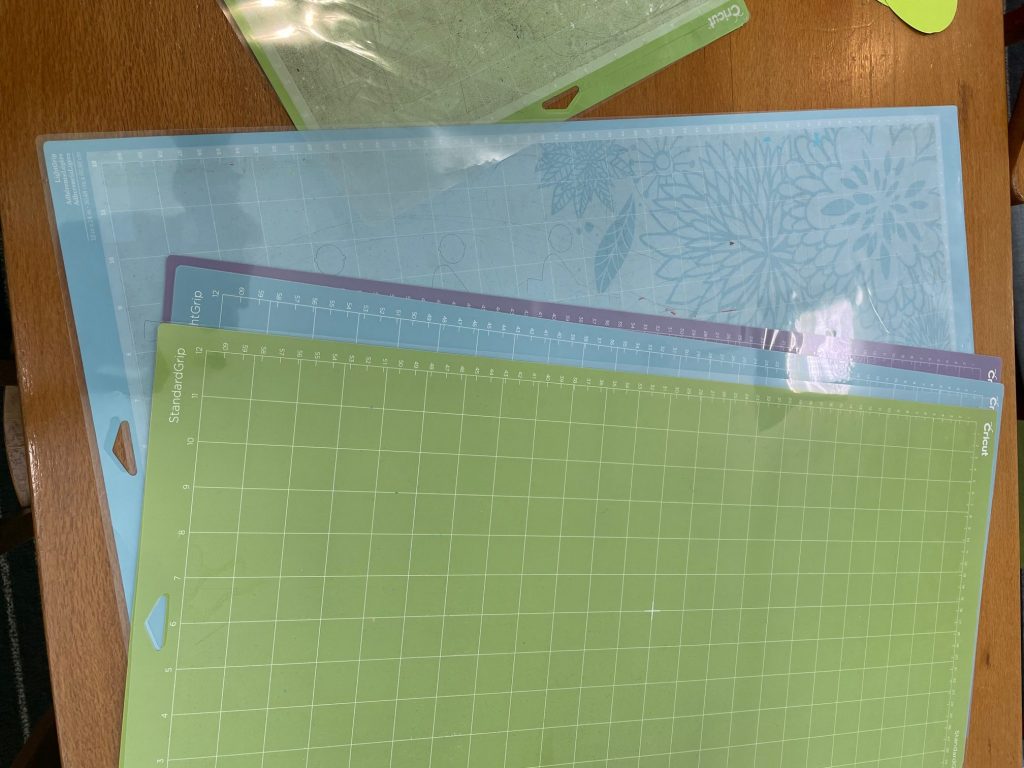
Do I need the different coloured mats?
Each Cricut mat has a colour. Blue for light, green for general, purple for heavy and pink for fabric. This refers to the stickiness of the mats and the material they are best used for. Up until a recent purchase, I’d only ever used the green mats and they worked just fine for all the materials I used. It’s kind of irrelevant once you clean them off and re-glue them. Use what you have and what you can get your hands on. I recently purchased a pack of three mats to update our machine so we had at least two of the large mats and the best value was the variety pack. If you are not sure, stick with the green general mats, as they will work the best for a variety of materials. You can also purchase generic brand mats which will work in the Cricut just fine if they are the right dimensions.
Blades
The blades are a pretty important part of the cutting process. Depending on your machine, there are a few different types of blades. The blades and housing for each machine are not interchangeable, so a Joy blade or housing won’t work in the other machines. The older Expression housing also won’t work in the Explore machine, for example.
Sharpening your blade
Before you buy a replacement blade, first try grabbing some aluminium foil, bunching it into a ball and stabbing the blade into the ball as many times as you can be bothered. This will sharpen the blade and you should get some more use out of it.
You can also increase your cutting pressure or select a thicker material option to get a blade to cut more deeply. If your blade is still ripping your material or not cutting through the material, it’s time for a new blade.
Joy
There is only one type of blade available and you can purchase replacement blades. You can also purchase a blade with housing, but unless you have lost or damaged the housing that came with the blade, purchasing a replacement blade is all you need.
Explore Air
There are a few options for the Explore machine when in comes to blade. The cheapest option are the two pack fine point replacement blades. I’ve purchased a few of these over the years and they are good if you are doing lots of repetitive cutting with paper and card and the designs are not too detailed. They don’t last long and you’ll need to replace them often. The machine comes with a premium fine point blade and it will last for ages and is great for detailed and general cuts and a range of materials. I find it’s better value to buy a replacement premium blade than the two pack cheaper blades, as the quality is so much better. You can also buy a premium blade with housing should you have lost or damaged the housing it came with. The Cricut Explore can also be used with a Deep Blade and housing and Bonded Fabric blade and housing. These you’ll need to buy with the housing to start with and then you can buy the replacement blades separately. These have specific materials they can cut.
Maker
There seems to be no limit to the blades and tools you can purchase for the Maker machines. These look and act differently from the other machine blades. You can purchase a range of housing, quick exchange tips, and blade options.
Software
The Cricut machines run through Cricut Design Space. You can access this on a computer or smaller device (iPad), either through the desktop application or the mobile app. There is also a quick Cricut Joy app designed for simple projects and super quick cutting. While the app gives you great flexibility, I do all my designing on the desktop application and then might use the app to just run the cuts. You can connect via Bluetooth or use the USB cord to connect to your desktop/laptop.
There are lots of tricks and tips for using all the functions of the Cricut Design Space software. You’ll find plenty of how-to articles and videos.
The Cricut Design Space will often auto update, but make sure you check you have the latest software to avoid problems.
Firewalls
If your school is like mine, your IT team might have a pretty strong firewall up that might prevent Cricut Design Space from running or auto updating. One quick work around was to open the Design Space and then reopen it, double clicking on the app again to relaunch it even while it was still open. This managed to stop the update looping problem. The IT team also added the Cricut software and sites to the approved list, which helped.
Logins
If you have a team using the library Cricut, create your account using a team email library@organisation.name.com, for example, so that you can all work on shared projects.
Do I need to pay for a subscription?
In all the years I’ve been using Cricut machines in my school library, I’ve never used the Cricut subscription. There were a couple of reasons.
1. I just didn’t need it. Between using free fonts online and uploading images and SVGs freely available online, I didn’t need the projects, images or fonts offered by the subscription.
2. There is no group or team membership. We use a team login, so we can all share the same projects. By purchasing a individual subscription, we would have been outside of the license agreement.
3. When we decided the subscription might be worth trying and we’d just use it for the individual team member doing the most on the Cricut, we couldn’t pay. There were problems. An American credit card needed to be used and to get around that it had to be done on the IOS app, which was fine, but then the card would have remained open on that device and anyone using that, including students, would have been able to make further purchases. We decided it just wasn’t worth the risk or hassle.
How to avoid using the subscription
We all know libraries have limited budgets so why pay for something you may not need.
Find free fonts online using sides such as dafont.com and 1001Fonts. Download them to your device, install and relaunch Cricut Design Space. You’ll find the font under system fonts.
Create and upload your own designs, find free project SVGs online or use free CC0 images or images under Creative Commons licenses to upload and use. I also love using Canva to find graphics to upload. Once you have downloaded the file to your device, use the upload option in Cricut Design Space to upload the image, remove the areas you don’t want in the cut, save and add to your project.
Training
Need more help, keep an eye on this site for more tips and training coming soon.
Put the call out to your staff, patrons or students. You might find you have a frequent Cricut user who could help you work through some basics or advanced tips.
Have any others ideas or tips? Share them in the comments below.

Leave a Reply