Making Your Own School Library Signage
Signage is one of the most important things you can add to your school library collections to aid access and remove the barriers students might face in trying to access the information they need. Fortunately, you can now purchase a wide range of signage options from school library suppliers, but it can be pretty expensive. I have always made my own signage for my school library collections, using a variety of different tools, software programs and resources, making my signage fully customisable and a lot more cost-effective. Using a few tips and tricks, your signage can look as professional as purchased signage.
Here are some examples to get you started.
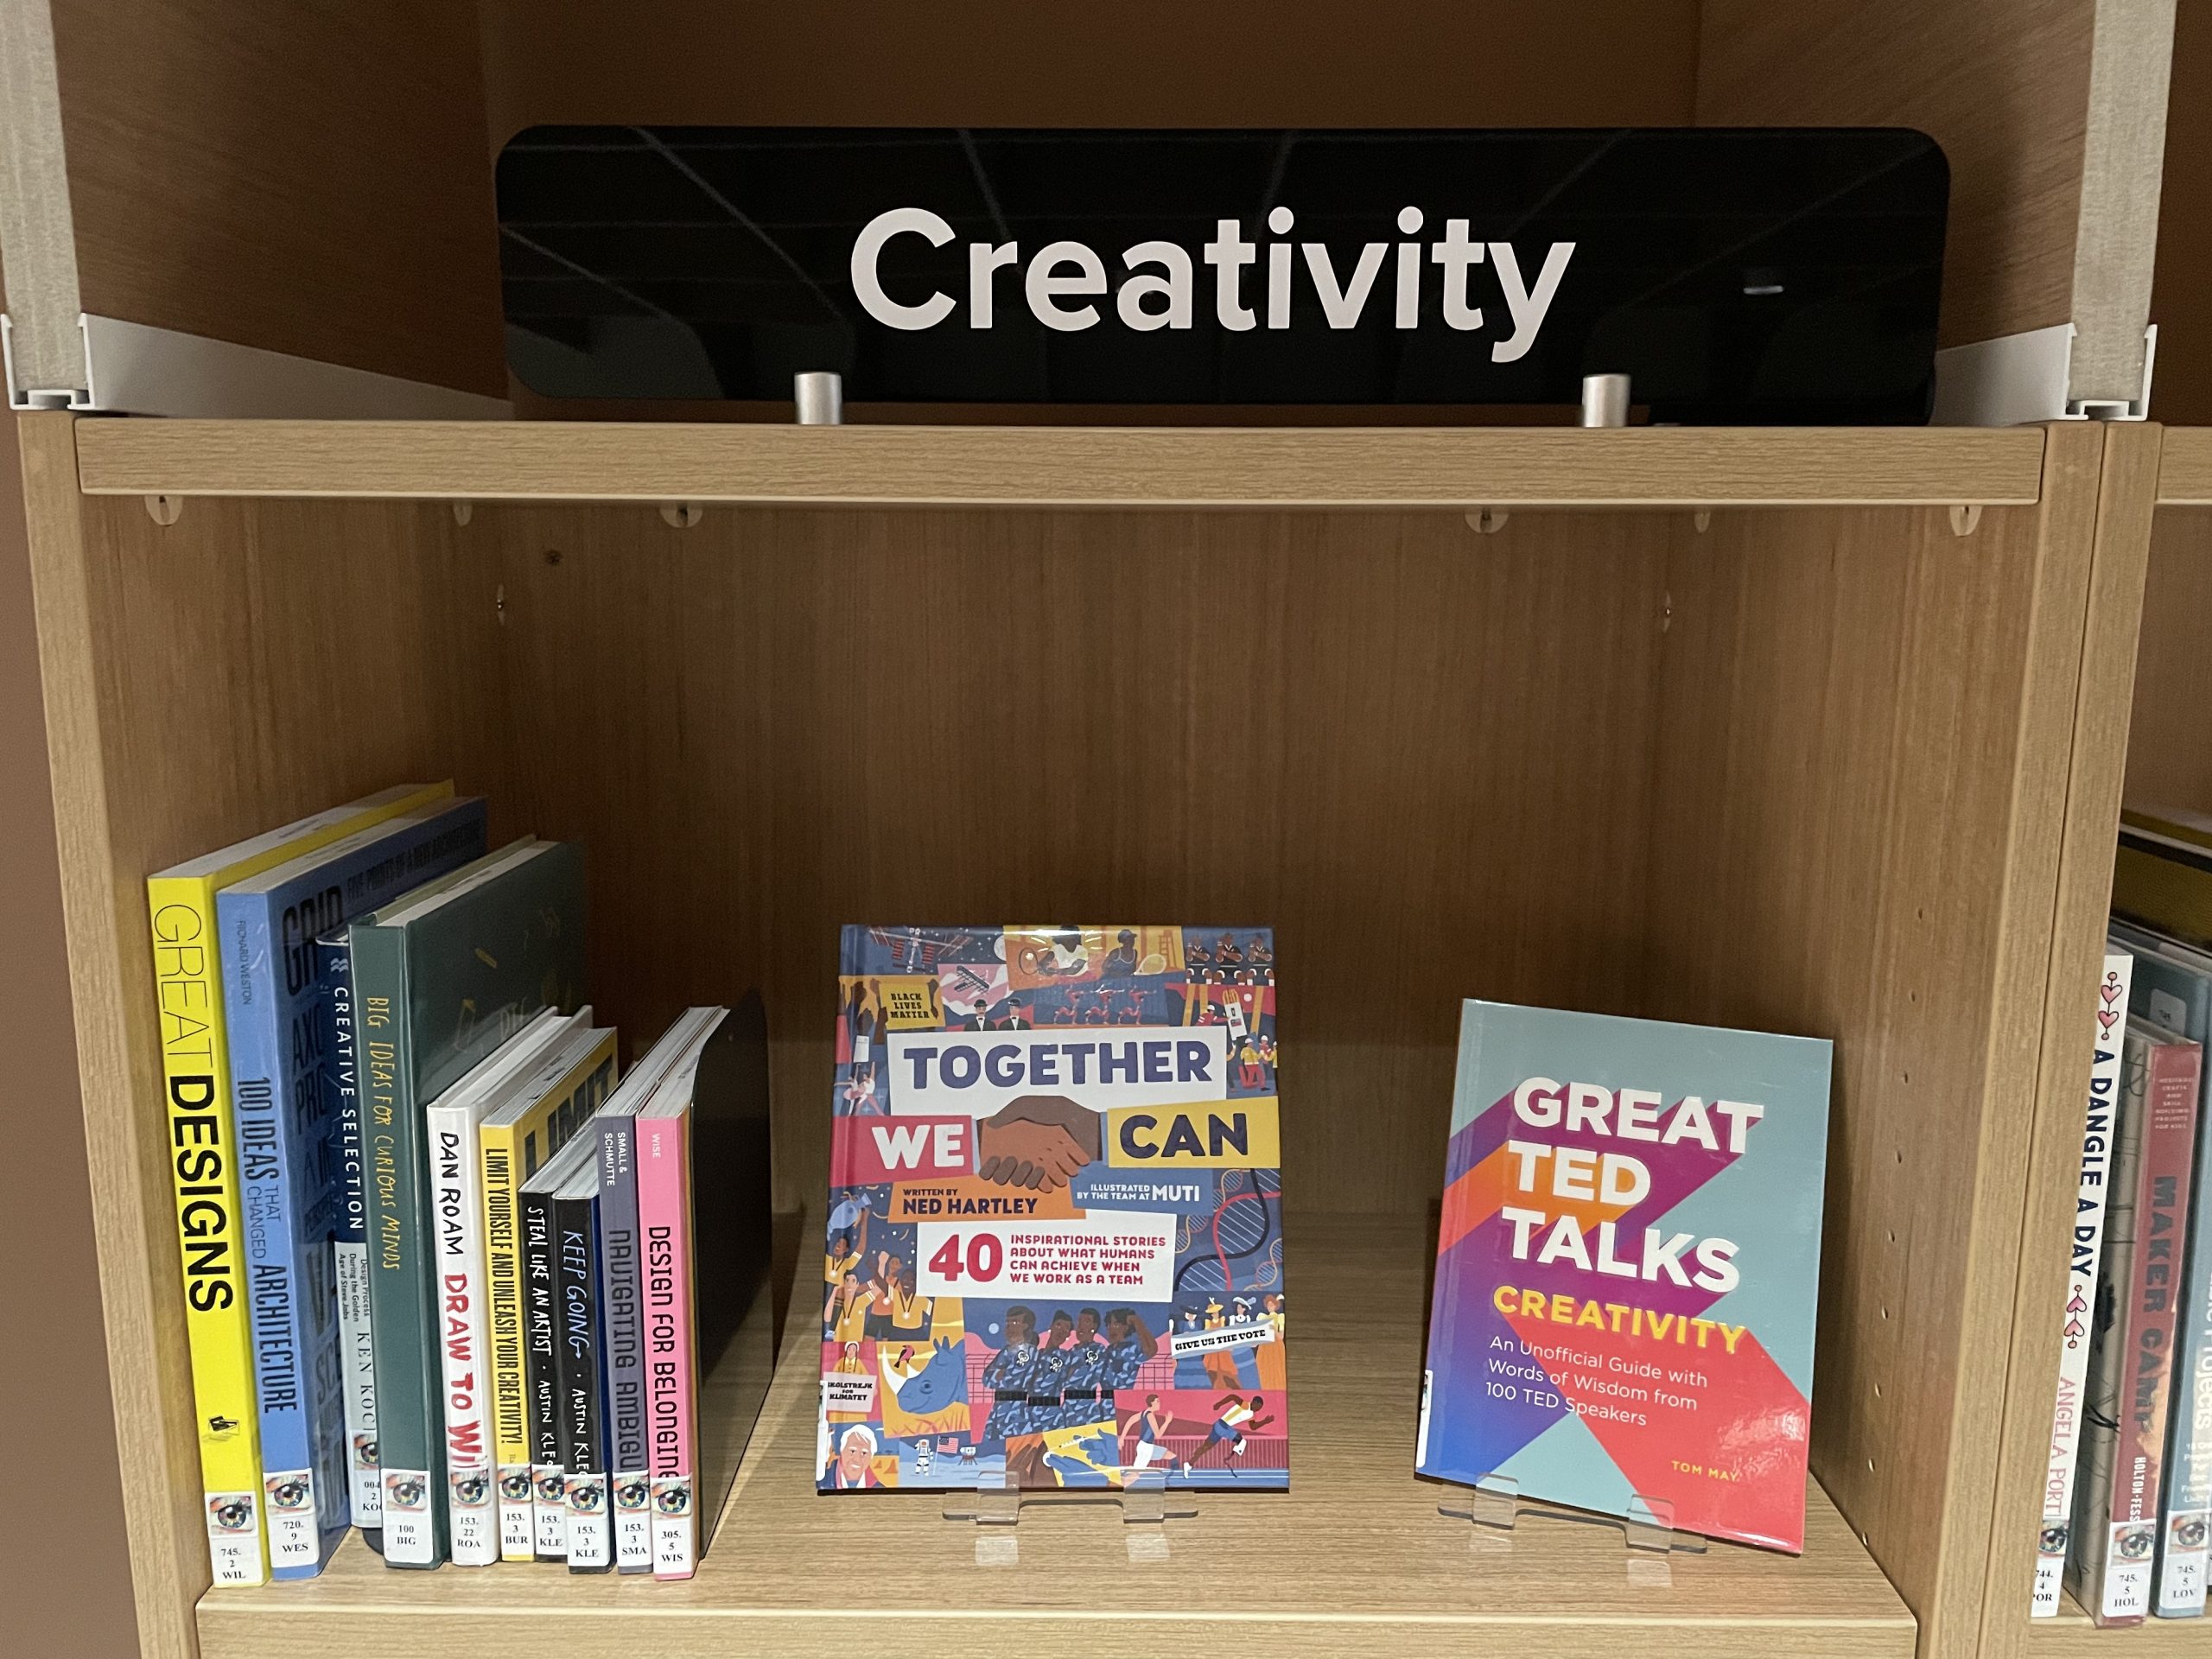
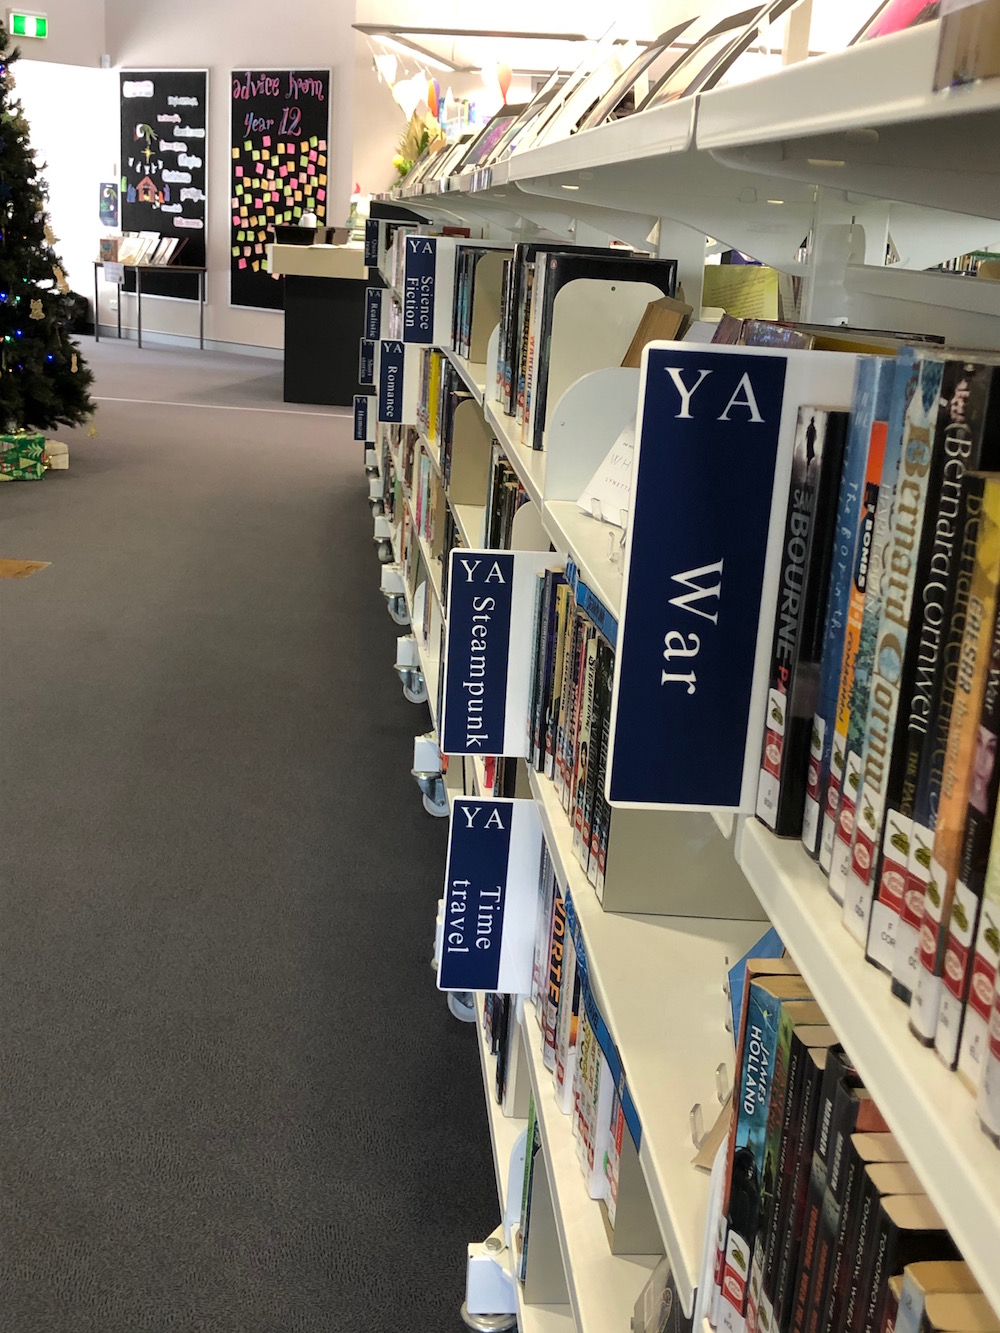
Top of shelves – large signs
This style of signage is pretty common now. Long, black signs with clear writing on them and little feet. While I really like the style, I couldn’t afford the price and I wanted a much glossier black acrylic rather than the matt material you can purchase these signs in. So, I made my own.
Tools and Equipment
Laser cutter
Cricut machine
Cricut machine weeding and scraping tools
Cricut Design Space software on laptop or ipad
Materials
Sheet of black acrylic 4mm thick (or any colour)
Removable adhesive vinyl
Transfer tape
Magnetic feet.
Procedure
Cut the black acrylic into the required shape. I must admit, this is where I drew upon the assistance of our Design Technology department and staff. I gave them the outline of the shape I wanted and then they cut them on the laser cutter for me. You could also get a local acrylic or sign company to do this bit for you.
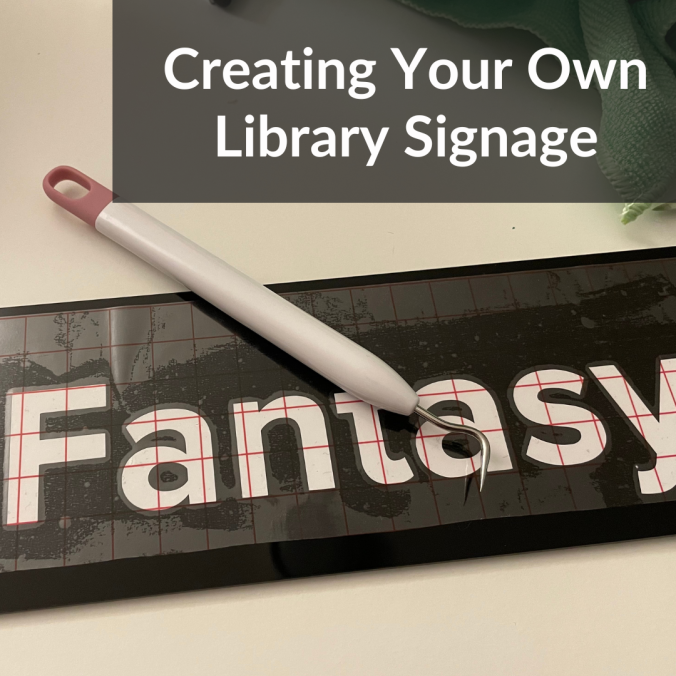
Design the lettering in Cricut Design Space and cut the adhesive vinyl on the Cricut machine. Weed the design, removing the outer pieces of vinyl and the insides of the letters. Use transfer tape to transfer your design to the acrylic. Add the adhesive feet (which I purchased through a library supply company).
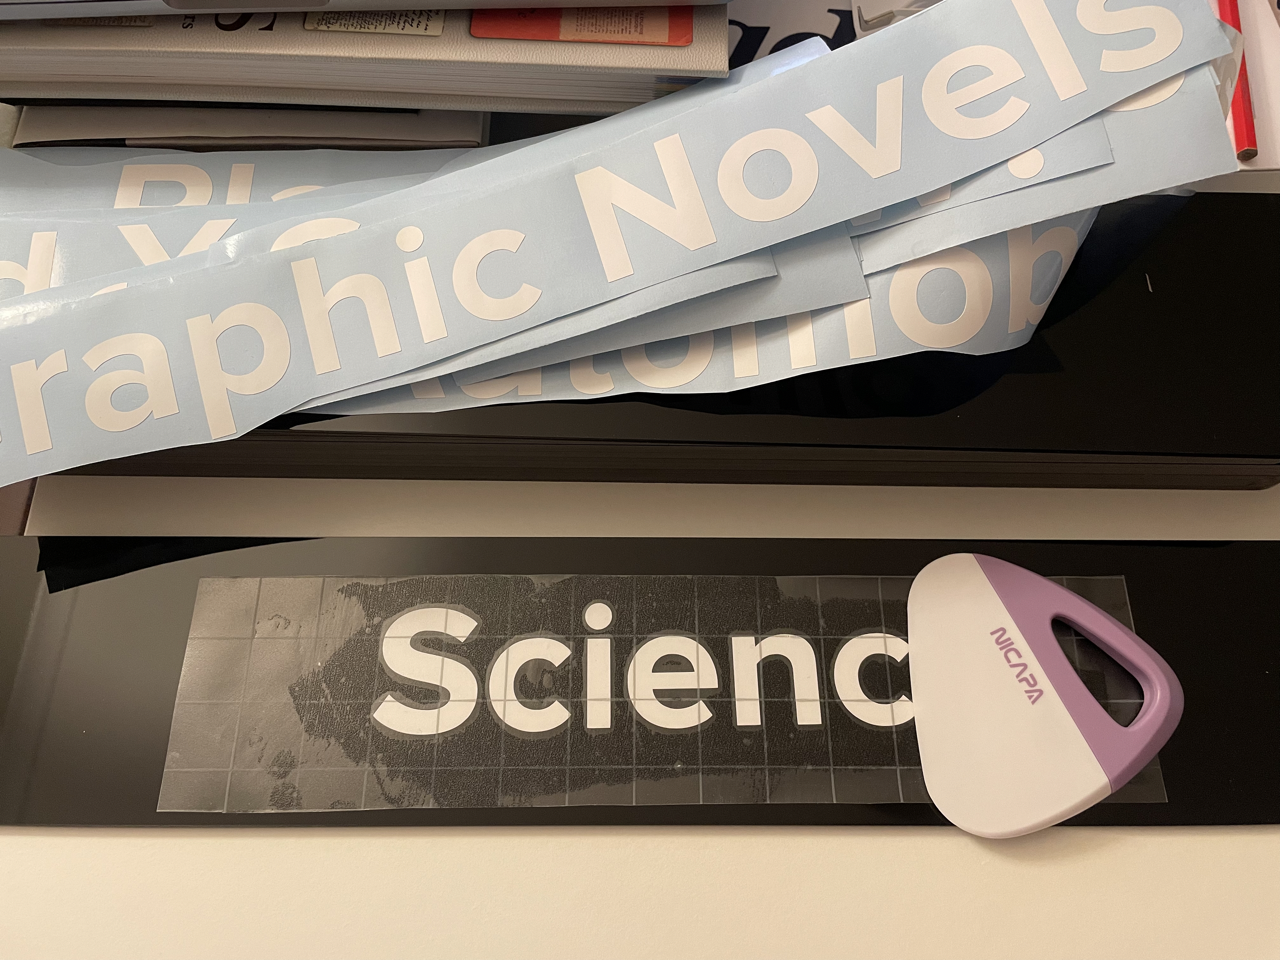
I used removable adhesive vinyl, Metamark 4, so I can easily remove the vinyl and reuse the sign. This is great for when I change the names of collections or move collections around and don’t need as many signs.

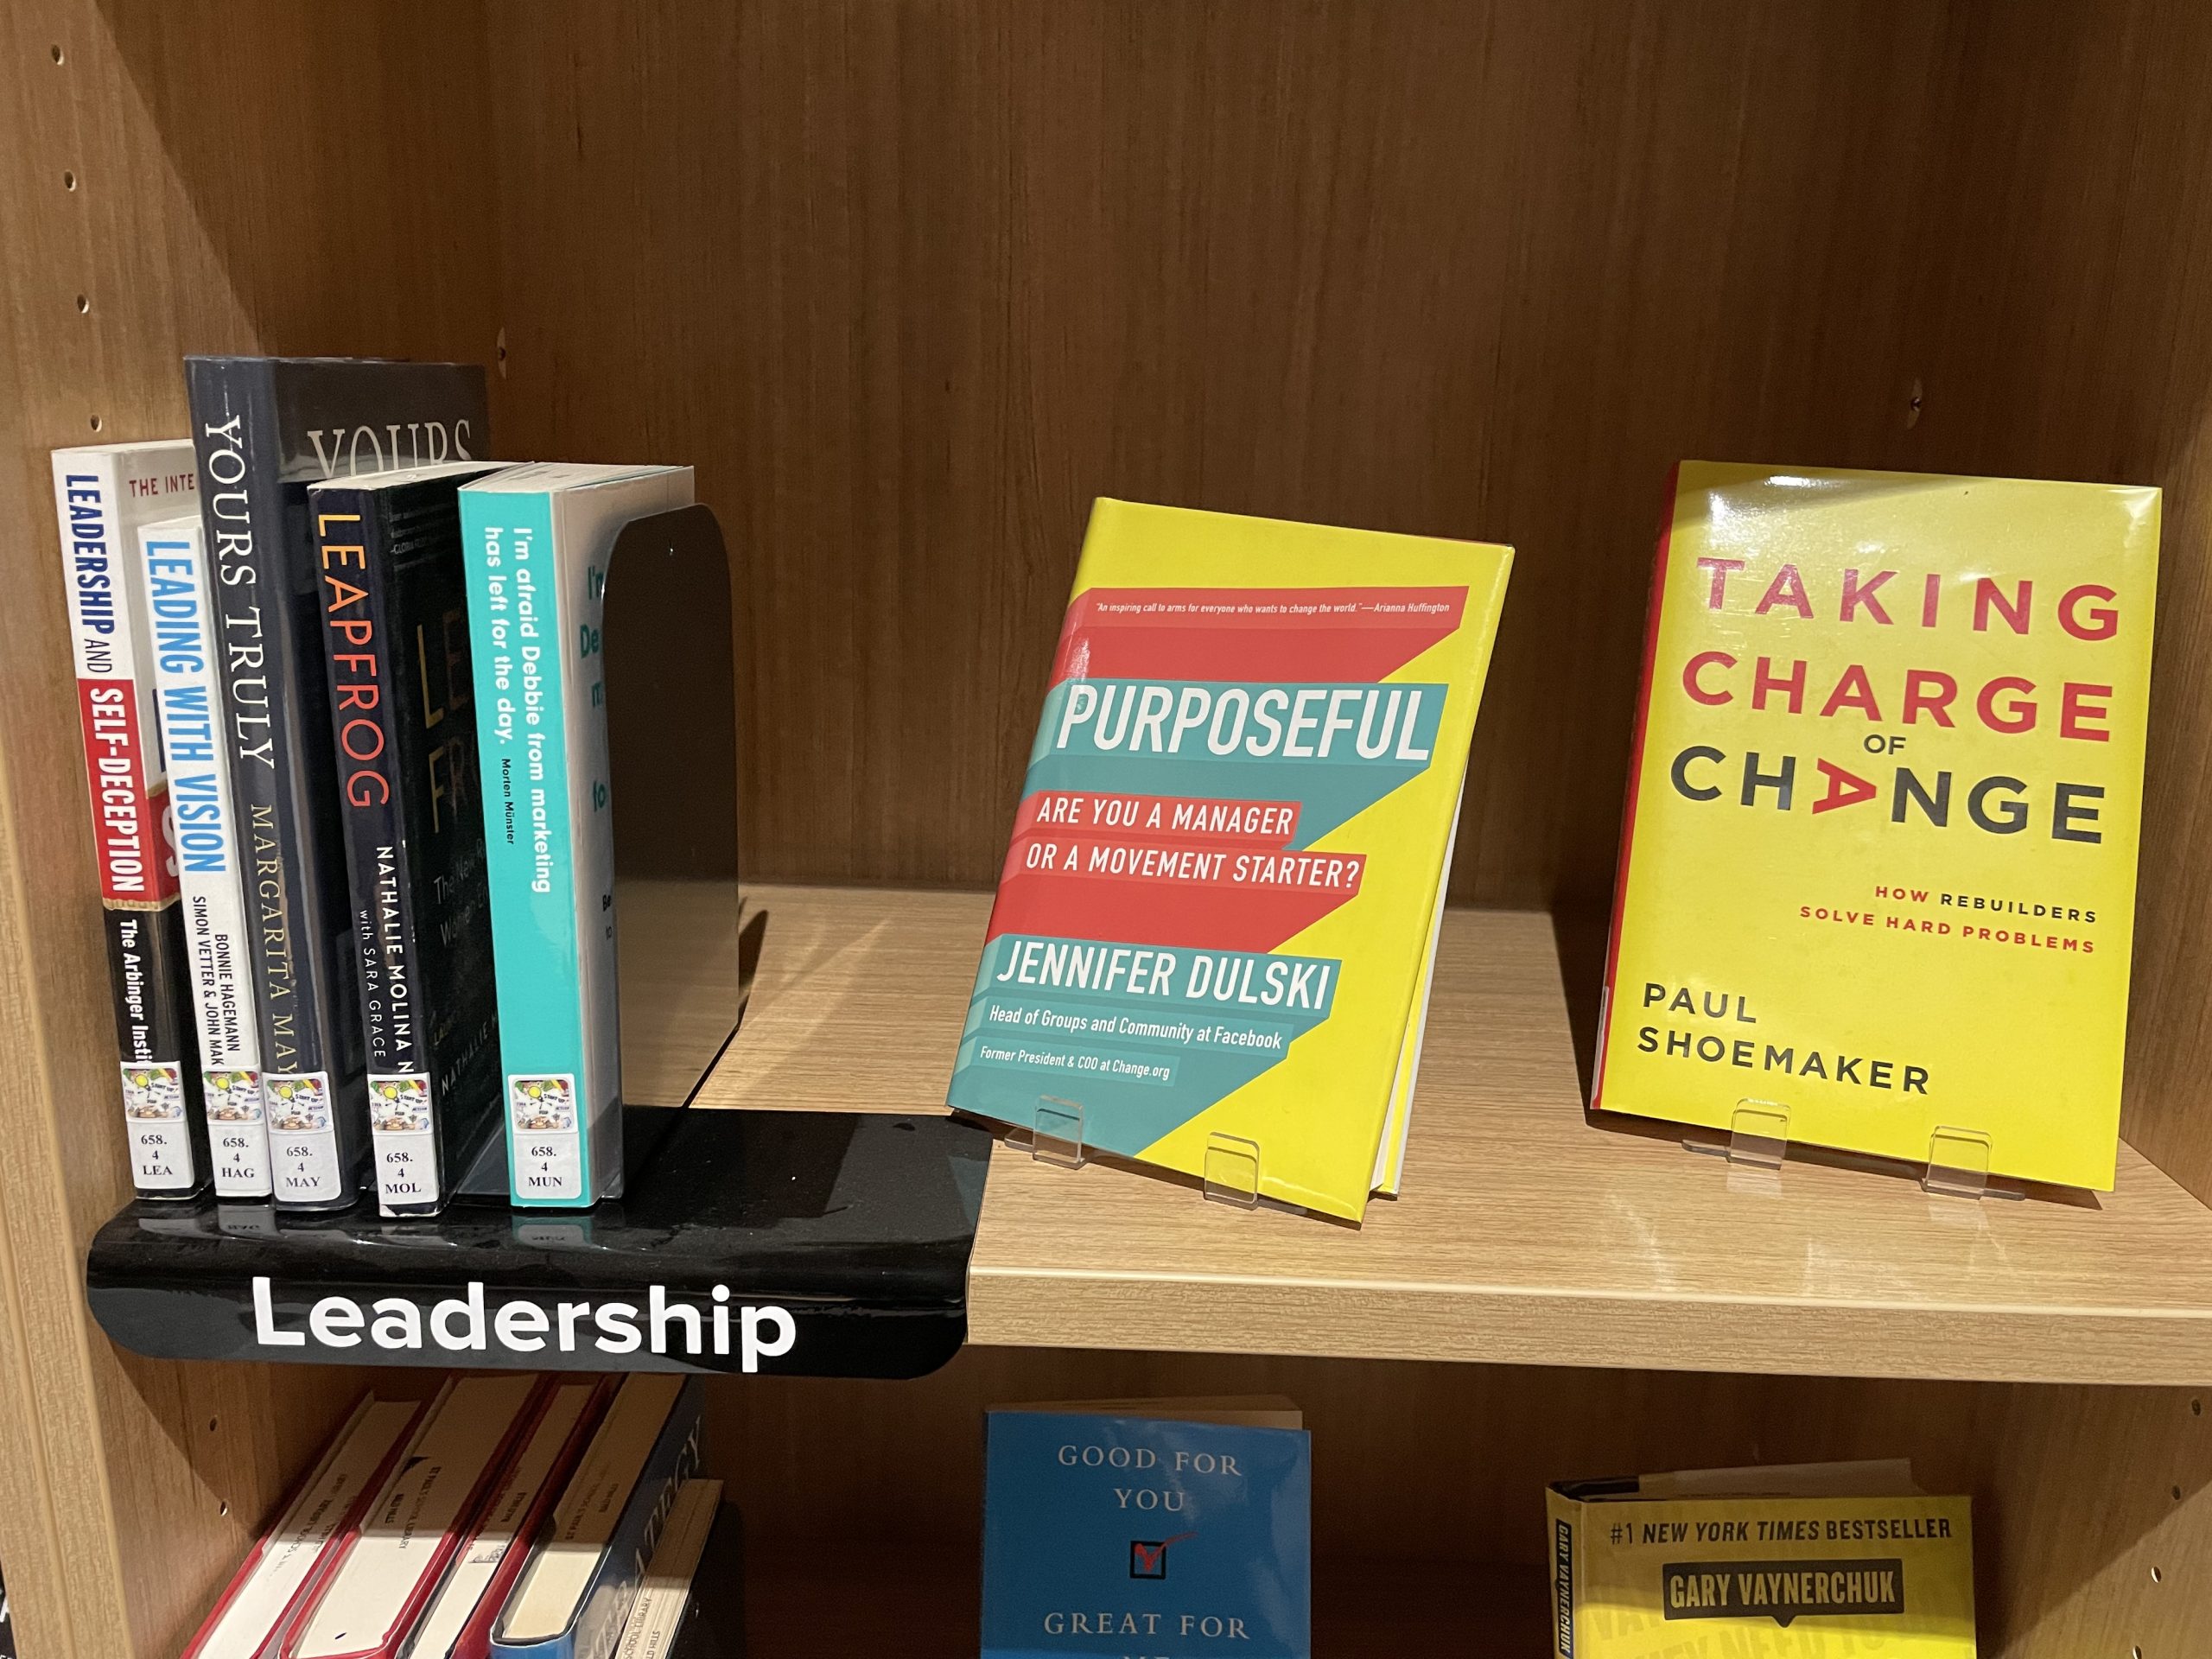
Mid-Shelf Signs
These signs sit on your shelf and wrap around it, sitting under the books. Again, these can be purchased commercially, but I wanted the same glossy black acrylic and to be able to customise my labels whenever I needed.
Tools and Equipment
Laser cutter
Hot wire machine
Cricut machine
Cricut machine weeding and scraping tools
Cricut Design Space software on laptop or ipad
Materials
Sheet of black acrylic 4mm thick (or any colour)
Adhesive vinyl
Transfer tape
Procedure
Cut the black acrylic into the required rectangle shape. Mine are 25mm long. My school Design Technology department and staff cut the acrylic on the laser cutter and I used the hot wire machine to heat the acrylic along the bend line and bend into a right angle.
Design the font in Cricut Design Space and cut the adhesive vinyl on the Cricut machine. Weed the design, removing the outer pieces of vinyl and the insides of the letters. Use transfer tape to transfer your design to the acrylic.
Vertical Shelf Signs
These vertical signs sit alongside your books and stick out from the shelf, making them easy to spot as you walk along the shelves and from a distance. These I purchased the base signs from a library supplier and added my own designs to the front, but you could easily make the sign from acrylic using the method outlined above.
Tools and Equipment
Cricut machine
Cricut machine weeding and scraping tools
Cricut Design Space software on laptop or ipad
Materials
Acrylic vertical signs
Adhesive vinyl
Transfer tape
Procedure
For this design, I used a reverse method, designing the image on Cricut Design Space, cutting and then weeding out the letters before transferring the rectangle to the sign using transfer tape. This method is a lot more time consuming, as you have to weed each letter. Colour of your adhesive vinyl is key here, as you need something that will contrast strongly with the acrylic colour underneath. Again, I use removable vinyl so I can re-do and reuse these signs as often as I need.


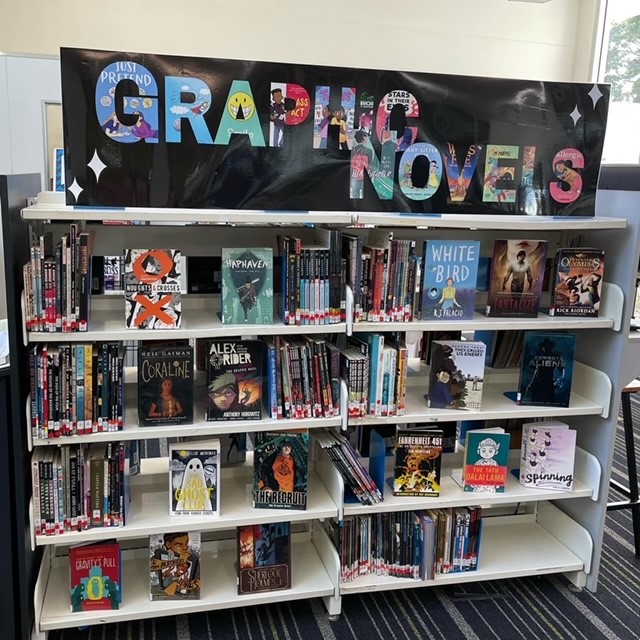
Large Printed Banner Sign
A large banner can add a very striking look to your shelves. Perfect if you have wall space above your shelves or space for a sign to sit on top of the shelves. You don’t need a poster printer to make these signs.
Tools and Equipment
Wide-format printer or regular printer
Canva
Wide-format laminator
Materials
Paper
Bookends
Procedure
Start by measuring your available space. From there, create a custom size project in Canva (learn more about getting started with Canva here). My banner size was 8000px x 2000px. Create your design on Canva. For this design, I used alphabet photo frame graphics and added the covers of popular graphic novels. Save and download your finished project as a PDF print. I had access to a wide-format printer, so I used that to print it to fit my shelves. If you don’t, simply download your PDF and open it with Adobe Acrobat – free to download and use. From there, click print and select poster. This will allow you to print your design across multiple pages. Print and cut and glue your poster together.

Laminating your sign will give it some extra strength or you could print it on thicker paper. Hang your poster or if you want it to freely stand, attach it to some spare bookends. A lot of blu-tak, tape and a spare ruler or two can be used to give it strength and hold your sign in place.
Wall sign
An eye-catching sign can be just the thing for a display board or blank wall near your collection.

Tools and Equipment
Cricut machine
Paper slicer
Materials
Paper
Glue
Old books
Procedure
For this sign, I designed the letters on Cricut Design Space and cut them from white card using the Cricut machine. I then sliced up a old, weeded graphic novel using a paper slicer into triangles. Using four sheets of A3 paper stuck together to make a large square, I layered on the triangles of cut book. Add a top layer of coloured paper and then glue on the letters. The triangle ends are a little flimsy, so for a longer lasting sign, laminate or cover everything with a thin layer of PVA or modge-podge glue.

Thank you for this post and being so generous in your advice and advocacy. I really enjoyed your session in Adelaide at the conference last Friday.
Thank you so much, Sandra. That’s very kind. So glad you enjoyed it.